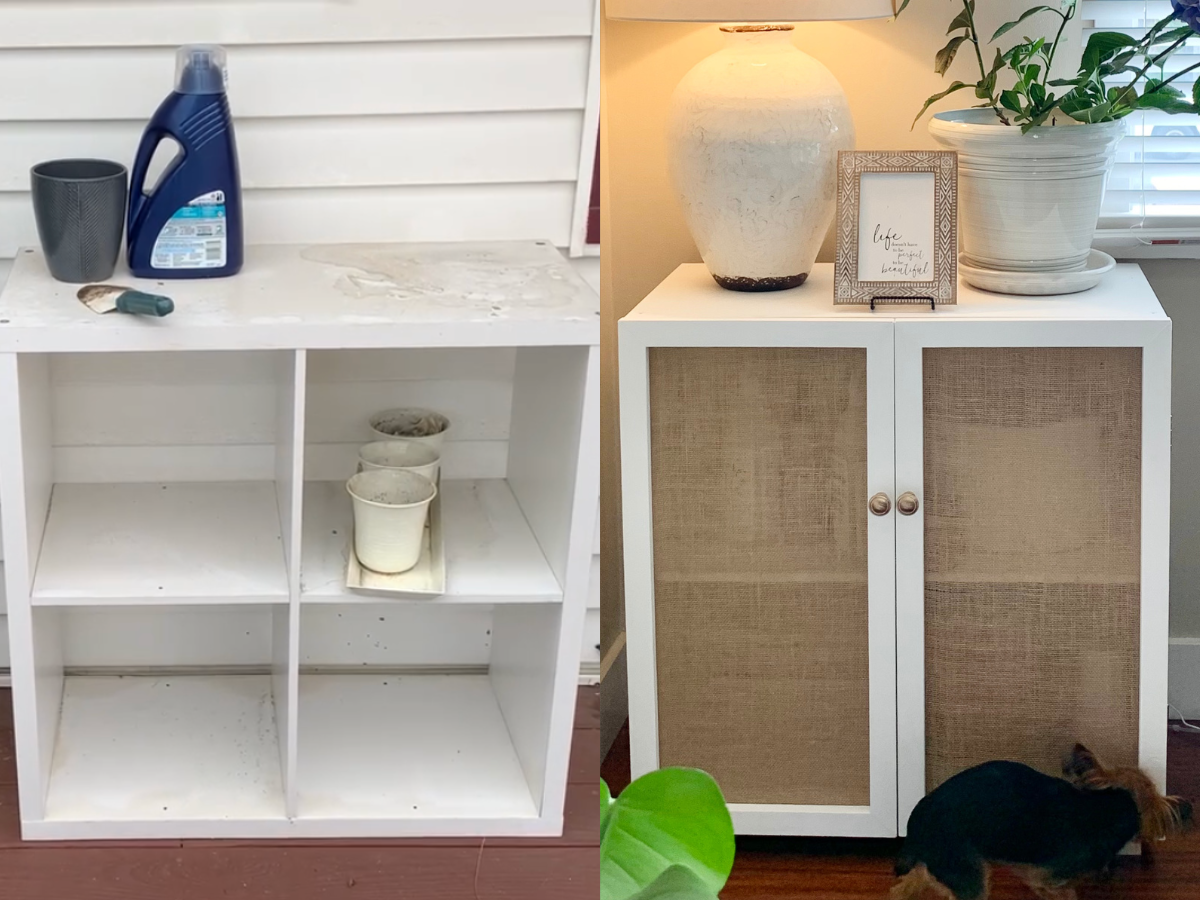
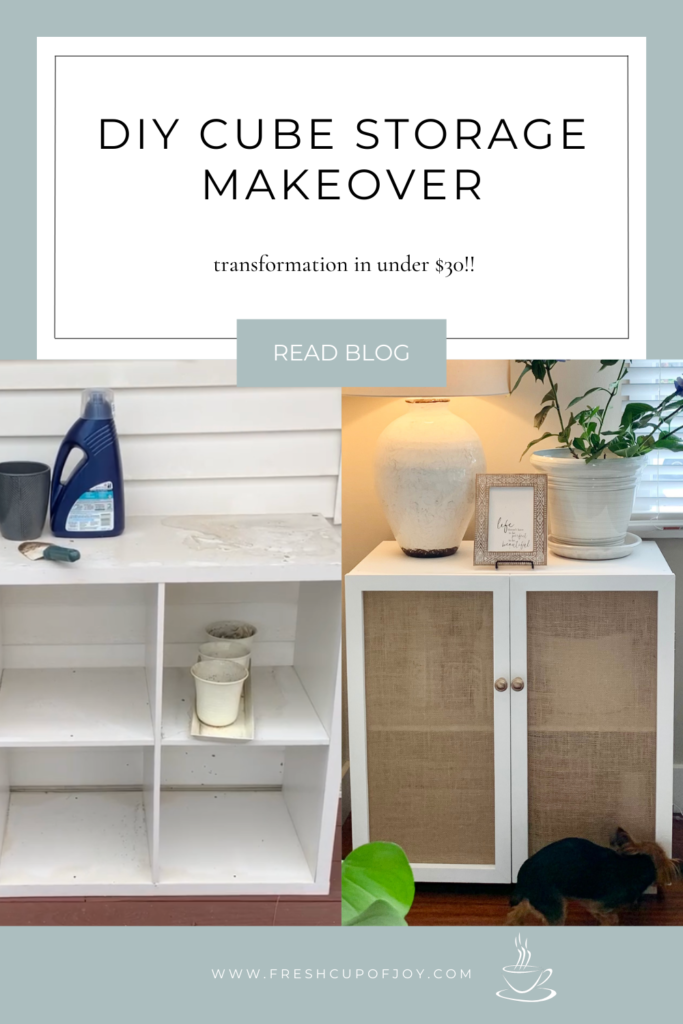
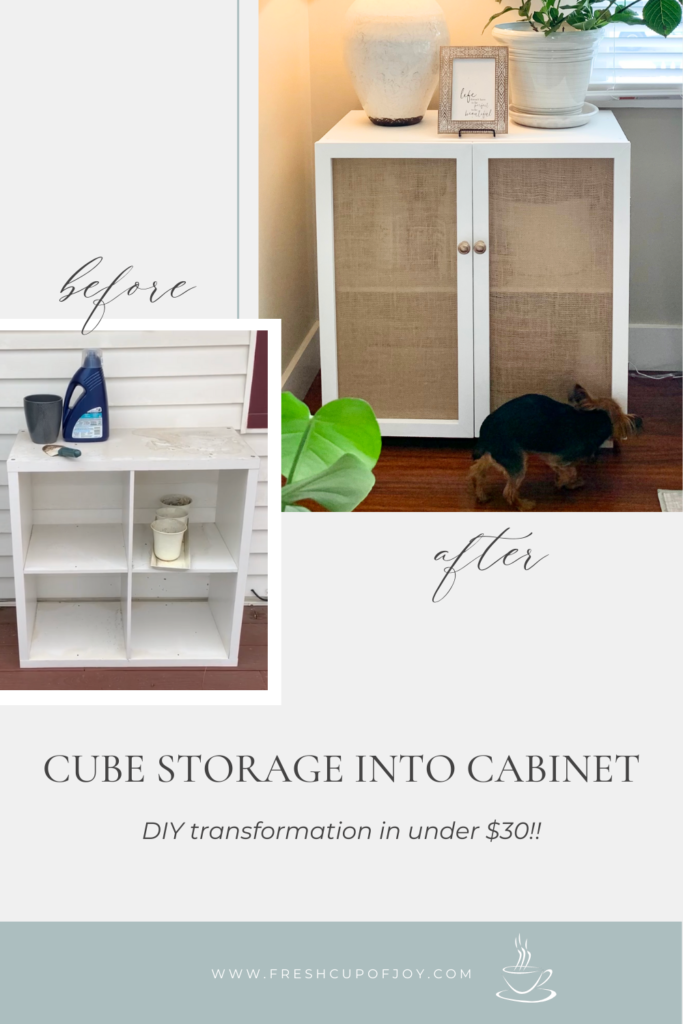
This DIY Cube Storage Makeover was my favorite project to date, and not just because it cost me under $30 to completely transform this old cube storage unit into a coastal themed cabinet!
Storage units are incredibly practical and versatile pieces of furniture that can be used to store everything, and many of us buy them as a semi-temporary piece before we can afford our dream decor. I’d been dreaming of adding a coastal cabinet to our living room but wasn’t up for spending hundred or thousands on a decorative piece, and this cube storage unit had been sitting on our patio for at least a year. While these units are functional, they may not always be the most visually appealing.
That’s where one of my favorite IKEA hacks comes in. By using some DIY magic, you can transform a plain cube storage unit into a beautiful cabinet that looks like it was custom-made for your space, or straight out of a high end catalog (did I mention the transformation cost me just $30?). In this blog post, I’ll show you how to turn a $20-30 cube storage unit into this beautiful coastal cabinet using some simple DIY tricks.
Materials & Supplies You’ll Need
To get started on your cube storage makeover, here’s what you’ll need:
- Cube storage unit
- Primer & Paint (I used white paint to cover some water stains and wear and tear. If you have a new looking cube storage unit, there’s no need to paint)
- 2″ x 1″ pine wood (primed)
- Cane webbing or burlap
- Wood beam or feet (if you want to elevate your cabinet with feet)
- Caulking
- Hardware:
- Tools you’ll need:
- Drill
- Screwdriver
- Saw
Some links may be affiliate links.
Step 1: Prepping & Painting Your Cube Storage Unit
Before you start painting or staining your cube storage unit, you’ll need to prep it. You’ll want to clean the unit thoroughly with a damp cloth to remove any dust or debris. If you’re planning on giving the storage unit some painting love or a new color, you’ll want to sand it down so the paint adheres better to the surface. Once you’ve finished sanding, wipe the unit down with a clean cloth to remove any dust. If you’re painting the unit, you’ll need to apply a coat of primer first to help the paint stick and have a smoother finish. Wait until the primer is dry then use a paintbrush or roller to apply the paint. You may need to apply multiple coats of stain to achieve the desired color.
Step 2: Trim the Cabinet Trim Pieces
Using a saw, trim the 2″x1″ pieces to the correct height size for your cabinet. Be sure to cut a 45 degree angle on each end of the trim pieces, facing the correct way. This will ensure that they fit together seamlessly when assembled.
Step 3: Secure the Corners Together
Fit all the trim pieces together to make a cabinet door, making sure they fit snugly. Once they’re all in place, attach the flat corner braces to each corner. It’s best to make pilot holes first to avoid splitting the wood, then screw them in securely.
Step 4: Fill in Gaps with Caulking
After the trim pieces are secured in place, you’ll likely notice some gaps between them. To fill these in, use white caulking to create a seamless finish. Simply apply the caulking to the gaps and smooth it out with your finger or a caulking tool.
Step 5: Add Cabinet Handles
Measure out where the cabinet handles need to be placed on the doors to ensure they’re at an even height. Then, screw them in place.
Step 6: Staple Burlap Onto the Back of the Cabinet Doors
If you like the sheer look, one layer of burlap is enough. If not, add two layers for a more opaque finish. Make sure the burlap is taut and staple it onto the back of the cabinet doors.
Step 7: Attach the Cabinet Hinges
Attach the cabinet hinges to the doors and then screw them in place. Make sure there is a slight 1/8″ gap between the doors so they don’t get stuck when opening.
Step 8: Add legs to the cabinet (optional)
To add legs to the cabinet, cut pillars or feet to the desired height and screw them through the top and into the leg under the cabinet.
Step 9: Add a backing (optional)
If you want to add a backing to your cabinet, purchase a thin 1/8 or 1/4″ board and nail it in the back. This will provide additional stability and ensure that nothing falls out the back of the cabinet.
With these simple steps, you can transform a cube storage organizer into a stylish and functional cabinet that will suit your storage needs. Whether you use it in a living room, bedroom, or office, this versatile piece of furniture will add both storage and style to your space. Best of all, it won’t break the bank!
For more DIY home decor hacks, recipes, and more check out our youtube channel and blog: