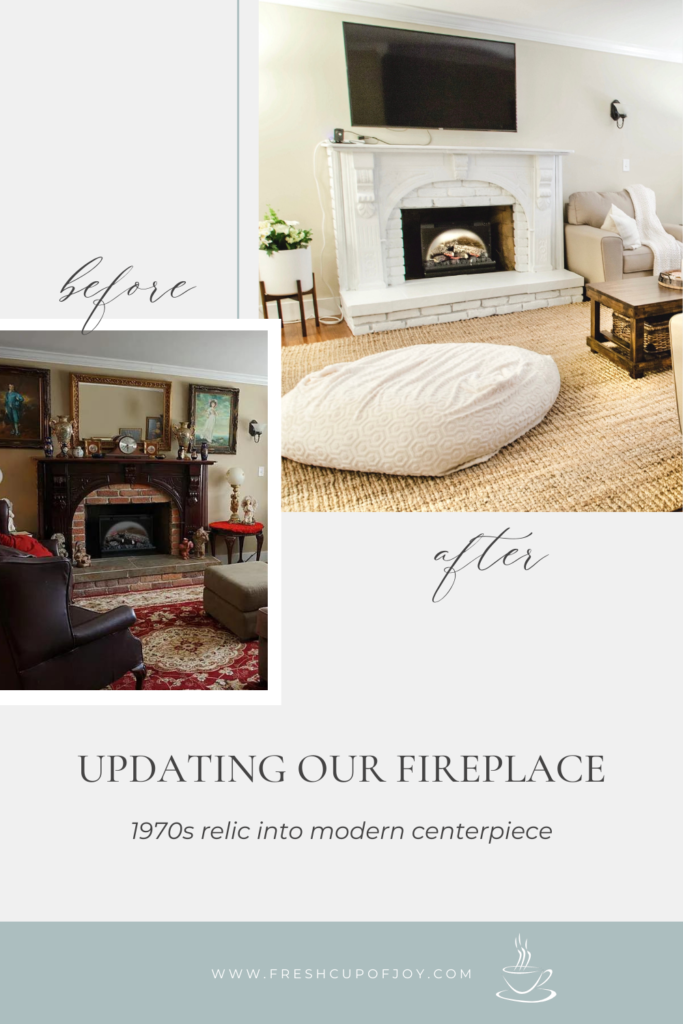
Welcome to our Brick Fireplace Makeover Before and After and the exciting journey of transforming our outdated 1970s brick fireplace into a stunning centerpiece that perfectly complements our farmhouse decor. In this blog post, we’ll take you through the step-by-step process of how we painted the entire fireplace white, including the brick, tile, and wood trim. Get ready to be inspired by our brick fireplace makeover before and after photos and learn how you can achieve a similar transformation on a budget. Let’s dive in!

Embracing the Charm of a 1970s Fireplace
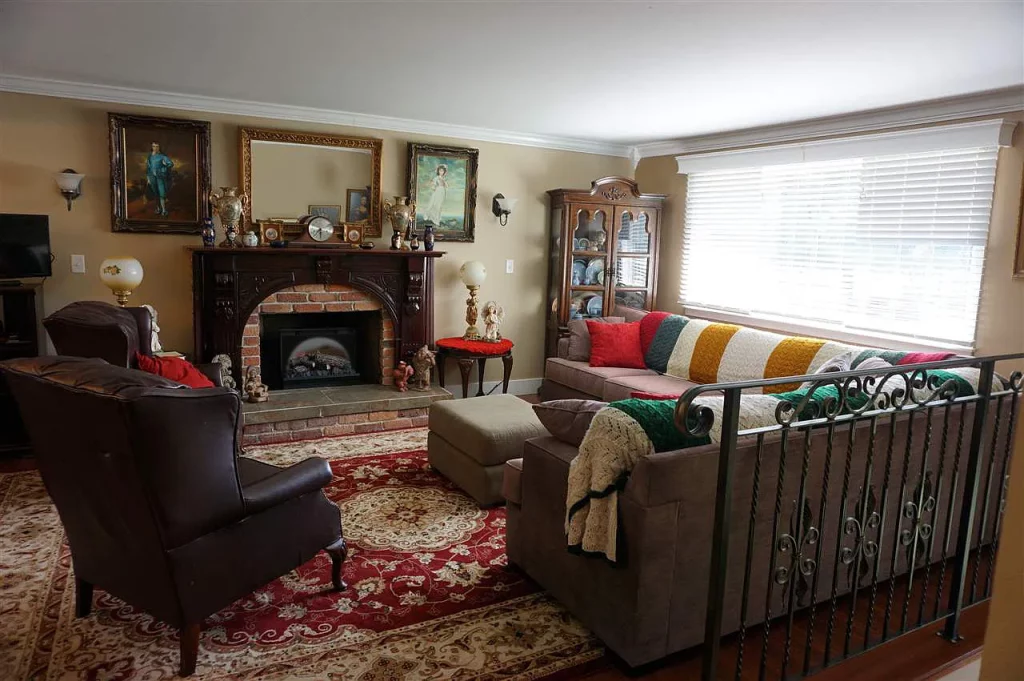
When we purchased our home, we fell in love with its vintage charm, but we knew that some of the features needed a modern touch. Our brick fireplace, with its worn brick, outdated tile, and wood trim, was a prime candidate for a makeover. However, we wanted to preserve its unique character while bringing it into the 21st century.
Planning the Transformation
Before diving into the transformation process, we spent time researching various fireplace makeover ideas that would suit our farmhouse aesthetic. We wanted a clean, fresh look that would seamlessly blend with our updated kitchen and overall home decor. After considering different options, we decided that painting the entire fireplace white would be the perfect solution.
Painting the Brick: From Dated to Delightful
The first step in our brick fireplace makeover was to tackle the brick itself. We wanted to transform the tired red bricks into a bright and inviting white surface. Here’s how we did it:
- Preparation: We began by thoroughly cleaning the brick surface, removing any dirt, grime, or loose mortar. This step ensured proper adhesion of the paint and a smooth finish.
- Priming: To achieve a long-lasting and professional-looking result, we applied a coat of high-quality primer specifically designed for masonry surfaces. The primer created a solid base for the paint to adhere to and helped to block any stains or discolorations.
- Painting: With the primer dry, it was time to paint the brick. We chose a high-quality latex paint in a crisp white shade, ensuring it would provide excellent coverage and durability. Using a medium-sized paintbrush, we carefully applied the paint to each brick, making sure to reach all the nooks and crannies.
- Finishing Touches: Once the paint had dried, we inspected the brick surface for any areas that needed touch-ups. We made sure to correct any imperfections and ensure a consistent, smooth white finish.
Updating the Tile: A Subtle Transformation
The tile surrounding the fireplace was another aspect that needed a refresh. While we wanted to maintain the existing tile, we also desired a cohesive look with the newly painted brick. Here’s how we achieved a seamless transition:
- Cleaning and Preparation: We cleaned the tile thoroughly, removing any dust, grease, or residue. This step was essential to ensure proper paint adhesion.
- Painting the Tile: Using a tile-specific primer, we primed the tile surface, allowing it to dry according to the manufacturer’s instructions. Once the primer was dry, we applied a thin, even coat of high-quality latex paint in the same white shade as the brick.
- (In hindsight, we would add this step) Protective Finish: To safeguard the painted tile from everyday wear and tear, you should apply a clear polyurethane sealant. This protective coat not only adds durability but also enhances the overall appearance of the painted tile.
Enhancing the Wood Trim: From Drab to Fab
To complete our brick fireplace makeover, we turned our attention to the wood trim. We wanted to update the trim to match the fresh, modern look of the rest of the fireplace. Here’s how we did it:
- Preparation: We began by thoroughly cleaning the wood trim, removing any dirt, grease, or previous finishes. This step ensured proper paint adhesion and a smooth, flawless result.
- Priming: Using a wood primer, we coated the trim to create an ideal surface for the paint. The primer helped seal the wood, preventing any bleeding or discoloration.
- Painting the Trim: Once the primer had dried, we applied a coat of high-quality white paint specifically formulated for wood surfaces. With careful brush strokes, we covered the trim, making sure to achieve even coverage and a smooth finish.
- Finishing Touches: After the paint had dried, we inspected the wood trim for any imperfections and addressed them with touch-ups as needed. This final step ensured a flawless, cohesive look for our newly transformed fireplace.
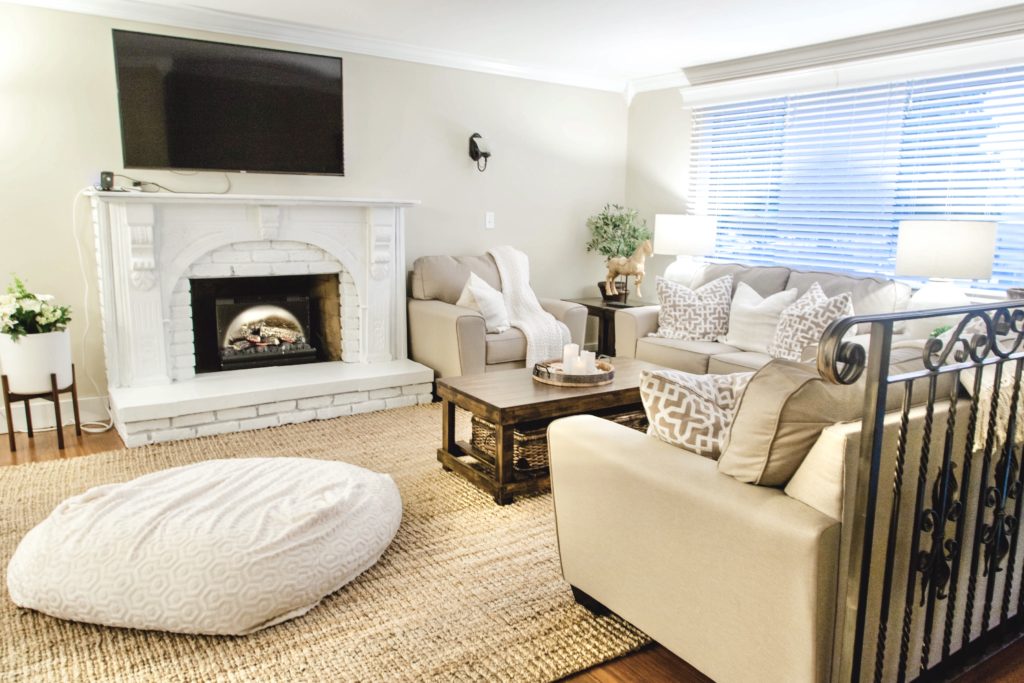
The Final Result: From Outdated to Outstanding
The moment we completed our brick fireplace makeover, we were in awe of the transformation. The combination of the white-painted brick, refreshed tile, and updated wood trim had completely rejuvenated the entire space. Our farmhouse decor now harmonized beautifully with the fireplace, creating a warm and inviting ambiance.
Brick Fireplace Makeover Before and After
Our brick fireplace makeover before and after journey was an exciting adventure that resulted in a stunning centerpiece for our home. By painting the brick, updating the tile, and enhancing the wood trim, we achieved a seamless blend of vintage charm and modern farmhouse style. This project proves that with a little creativity, a tight budget, and some elbow grease, you can transform any outdated feature into a show-stopping masterpiece. We hope our experience inspires you to embark on your own fireplace makeover journey, breathing new life into your home.